setup for DevNexus workshop – BDD with Spock and JUnit 5

Burk Hufnagel and Jeanne Boyarsky will be presenting a full day workshop entitled “Behavior Driven Development with Spock / What’s new with JUnit 5“. at DevNexus this year. Attendees will use their laptops.

If you run into any trouble setting up for the lab, you can post a comment on this blog post or start a thread in the Testing or IDEs forum at CodeRanch.

Here’s what needs to be installed:

Java

The workshop uses Java 8. If you have Java 9 installed, please ensure it is not the default:

  • Windows/Linux: Update your path
  • Mac: mv /Library/Java/JavaVirtualMachines/java 9/Info.plist /Library/Java/JavaVirtualMachines/java 9/Info.plist.disabled

Validation: run java –version at the command line and ensure it prints out a Java 8 version.

Eclipse (recommended)

You can use the IDE of your choice or none at all. We will be able to answer all questions about Eclipse and the command line. If you choose IntelliJ (2017.2.1 or later), please be sure you are comfortable navigating, running tests and running builds in it.

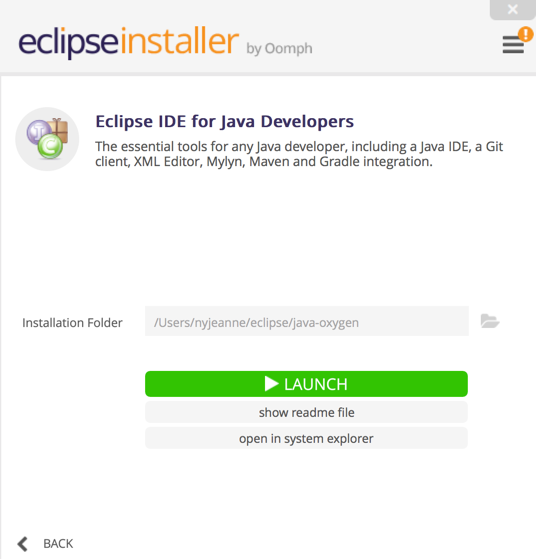
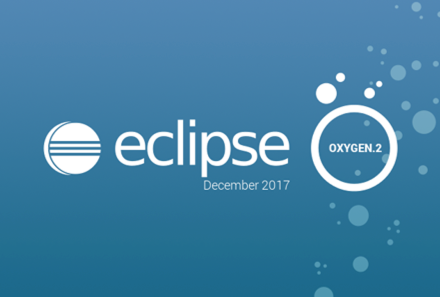
  1. Download and install Eclipse Oxygen. If you already have Eclipse Oxygen, check the splash screen says it is the December version. If not, please download the latest Eclipse Oxygen.
  2. Help > Eclipse Marketplace Install the STS (Spring Tool Suite) plugin

Validation:

  1. Try to create a new empty Gradle project:
  2. File > New > Other > Gradle Project
  3. Give the project a name and finish
  4. Wait a minute or two for the project to be created
  5. File > New > JUnit Test Case
  6. Confirm you have a radio button called “New JUnit Jupiter test”
  7. Click cancel to exist the wizard
  8. File > New > Other > Spring > Spring Bean Definition
  9. Click cancel to exit the wizard
  10. Success, you are ready for the workshop!

Optional: Gradle

We will be using Gradle as the build tool. While the projects will contain a Gradle command line, you are welcome to use your own Gradle install.

Optional: Git

One of the steps will be to pull code from git. If you have a git command line (or git bash), this is a one line operation. If not, you’ll be able to download a zip file from github so this isn’t a hard requirement.


getting started with gradle in eclipse on a mac

I’ve used Gradle before although not a ton. For example, I compared eGradle and Buildship here. It’s been a while though. Which means my laptop setup has changed enough for it to be an adventure. (and not everything I needed to know was in my memory).

Eclipse Oxygen comes with Gradle installed so I thought this would be easy. And if I had never installed Java 9 on my computer, that would have been the case. After all, you just need to run: File > New > Gradle Project

The original problem

I tried that and got this error:

org.gradle.tooling.GradleConnectionException: Could not fetch model of type ‘BuildEnvironment’ using Gradle distribution ‘https://services.gradle.org/distributions/gradle-3.5-bin.zip’.

Caused by: java.lang.reflect.InaccessibleObjectException: Unable to make protected java.lang.Package[] java.lang.ClassLoader.getPackages() accessible: module java.base does not “opens java.lang” to unnamed module @2e59aa

I got a similar error when trying to import an existing Gradle project. I have Gradle installed on the command line and it works fine.

What didn’t work 

I want to be using Java 8. I tried the following things that didn’t help:

  • Change eclipse.ini to use Java 8
  • Remove all Java 9 JDKs from the Eclipse workspace preferences.
  • Adding a system JAVA_HOME environment variable pointing to Java 8
  • This workaround editing the build.gradle file
  • A new workspace (my teammate teases me that my workspace was around when Obama got elected – I often do an upgrade in place)
  • Gradle code for Eclipse
  • Checked my versions against what is known to work. I do have Buildship 2.2+ (2.2.1) and Gradle 4.3+ (gradle 4.5).
  • Re-installing Eclipse and not installing/updating any plugins

Updating the plugin

Then I updated the Buildship plugin in Eclipse. Since I had done this in the past, I had to:

  1. Delete the Buildship update site
  2. Re-add the current update site. (Thanks to this post for the suggestion)
  3. Update plugin
  4. Restart Eclipse

That “helped” in that I got a different error:

Caused by: org.gradle.internal.exceptions.LocationAwareException: Unable to make protected void java.net.URLClassLoader.addURL(java.net.URL) accessible: module java.base does not “opens java.net” to unnamed module @6740e13b

This time it created the project on disk and merely didn’t import it. Importing had the same problem though. There is at least one known error with Java 9 and Buildship. And I’m getting a Java 9 error so clearly, I still have something pointing to Java 9 on system.

What actually worked

Running java -version showed I had Java 9 as my system default. This is because Mac defaults to the latest version. I didn’t have a problem earlier because Eclipse itself was set to use Java 8. (except when I’m playing with Java 9.)

I actually had to disable Java 9 on the Mac so it would recognize Java 8 as the default. This post shares how:

  1. cd /Library/Java/JavaVirtualMachines
  2. cd into my Java 9 directory
  3. cd contents
  4. mv Info.plist Info.plist.disabled
  5. Restart Eclipse

And a quick review of Gradle/Buildship

  1. You can intersperse running command line gradle commands and using Buildship. Since everything is stored in the gradle directories, they remember state from each other.
  2. To run “gradle clean” or “gradle build” in Buildship the first time:
    1. Go to the Gradle Tasks view
    2. Expand project
    3. Expand build
    4. Right click clean (or build)
    5. The Gradle Executions view shows what is still running
    6. The Console view shows the command line output
  3. To run “gradle clean” or “gradle build” in BuildShip the second time:
    1. Buildship automatically creates a run configuration for any builds you run. They have clear names (ex: atlanta-tourism – clean”) so you can easily find the right one. You can sticky common ones to the top since they are normal Eclipse run configurations
  4. To delete the whole gradle cache: rm /Users/xxx/.gradle/caches
  5. To delete a specific artifact rm /Users/nyjeanne/.gradle/caches/modules-2/files-2.1/… (I forgot to include a dependency and seeing everything re-downloaded helped)


eclipse oxygen (4.7.1.a) for the mac for the third time

I had downloaded Eclipse Oxygen when it came out in June. Then I downloaded the September version for early Java 9 support along with the JUnit 5 add on for the JavaOne Hands On Lab I delivered. This required downloading the Eclipse plugin. I’m giving a similar/longer JUnit 5 lab at DevNexus this month. It makes sense to start with a clean version for students to install. Therefore I decided to install Eclipse Oxygen for the third time.

This time I downloaded the December release of Oxygen (4.7.1a). It includes JUnit 5 and Java 9 support.

Installing

I downloaded Eclipse and chose “Eclipse IDE for Java Developers” from the wizard.

Opening Eclipse, I confirmed that I was using the December 2017 package.

Installing the plugins

The significant plugins I chose to re-install are listed in this table. eGit, Buildship (for Gradle), m2e (Maven) and I think EclEmma were already installed without me doing anything.

Plugin Purpose
Eclipse Tomcat Plugin One click launch for recent versions of Tomcat. Both are listed as being successors to Sysdeo. While both seem fine, I went with the “Eclipse Tomcat Plugin” that I had before updating Oxygen.
SonarLint  I use SonarLint daily to look for errors in my code.
Subclipse I got errors installing Subversive last time and switched to Subclipse.
Eclipse Memory Analyzer For finding memory leaks. Unlike last year with Neon, it installed cleanly from Eclipse Marketplace.
Freemarker IDE Freemarker syntax highlighting and macro assistance.


Pydev Python plugin/perspective
Contrast To spot potential security issues. See my impressions of the Contrast plugin.
Bytecode Outline I’ve been looking at bytecode a good fit for the book to make sure I understand why things are happening. This plugin makes it easy. I first tried Bytecode Visualizer but install failed. (The website says there were 25 failed installs with the same dependency problem in the last 7 days). After installing Bytecode Outline, I realized this was the one I had installed for Luna anyway.
Pitclipse For mutation testing coverage