Hands on with iOS 4.2 [iPhone4/iPad]

I upgraded both my iPad and iPhone 4 to iOS 4.2 this afternoon, and with few exceptions, the results are quite positive. In short, “Find my iPhone/iPad” is awesome but creepy, AirPrint is seriously lacking, and the iPad updates are a long time coming. The only big downside is that Apple went ahead with its plan to eliminate the landscape/portrait lock button on the iPad, instead replacing it with a mute feature. Read on for more details of my hands-on experience with iOS 4.2 on both the iPhone and iPad.

iOS 4 on the iPad at last

One of the most long-awaited features for the iPad is the ‘missing’ iOS 4.0 updates that arrived with the new iPhone back in June. Five months later, Apple finally released updates to the iPad that have been available on the iPhone for months — including multi-tasking, Game Center, and folders to organize applications. Although some reviewers, myself included, have criticized the “faux” multi-tasking available in iOS 4, it is nice to see these updates finally released on the iPad.

New Feature: Find my iPhone/iPad

One of the newest, and possibly the most unexpected, feature is the new, free “Find my iPhone/iPad/iPod Touch” service, which previously was only available for paid MobileMe subscribers. Unfortunately, iPhones older than the iPhone 4 appear to be excluded from this service.

In order to use this feature, you must have an AppleId. If you purchase music on iTunes, you can use that same account. Once you have installed iOS 4.2 on one of your devices, you need to navigate to Mail/Contacts/Calendars, and add a MobileMe account using your AppleId. Once added, you just use a single click to enable this feature.

To track the device, remote-lock it, or remote-wipe the data, you can log in from the Apple MobileMe portal, again using your AppleId. You can also download the “Find iPhone” application and track the device from another iPhone, iPad, or iPod Touch.

One issue I did notice is that you have to have your AppleId match your e-mail address. When I tried to set up my iPhone with an AppleId that was a nickname and not an e-mail it came back with a message saying “This AppleId does not support this feature”. Fortunately, you can log in to the Apple website, and as long as your e-mail isn’t attached to a different AppleId already, you can change the AppleId to match your e-mail.

One ‘creepy’ side effect of all of this is that since my wife and I both have an iPhone 4, they can actually be set up to track each other. In other words, you can always find out where your spouse is. For children, though, this would be an excellent feature, since you can find out where they are without interrupting them. The only problem is there’s no way to lock this feature as ‘always on’. Your children can easily turn this feature off and a stranger who finds your device can disable it before you have had a chance to remotely wipe your personal data. One major improvement would be a password requirement to enable/disable this feature on the iPhone.

Update 11/28/2010: One reader pointed out you can enable “Restrictions” under “General” settings that allows users to fully use the iPhone but prevents them from adding/removing accounts. This essentially allows you to keep the MobileMe tracking feature enabled at all times. In the event of a loss, the phone can be reliably wiped remotely although this does not prevent the user from wiping it themselves with iTunes. It does give you piece of mind, though, that you can block access to your personal data even if the iPhone is never returned.

AirPrint: Where’s Bonjour support?

Although Apple did add print capabilities with the iOS 4.2 update, they are limited to “AirPrint compatible” printers connected to a computer, of which there are few. Surprisingly, printing to a Bonjour printer connected via an Airport Extreme router is not supported. Also, direct printing via IP address to a networked printer is not supported. I am mystified that Apple released WiFi printing without either of those two obvious features, but we’ll have to wait for future versions to get more useful print options.

iPad: Screen-locking switch, we hardly knew ye

The most disappointing feature of the update is Apple reconfigured the screen lock button on the side of the iPad, the one that keeps it in the same orientation now matter how you hold it, to be a volume mute button. I have already heard feedback from friends that agree this was a terrible idea. Trying to use the iPad in bed can be problematic as holding any direction but right-side-up can cause the orientation to change. I would not have minded this change if they had at least left a software option to switch it back, but so far no such option exists. It’s a shame, as I suspect my iPad will be a lot less user-friendly without it.

Conclusion

Overall, the iOS 4.2 adds welcome additions to the iPhone, iPad, and iPod Touch. I considered not updating the iPad to keep the screen-lock feature, but decided in the end that the benefits outweighed what I was losing. I really like the free tracking service, since losing an iPhone is not uncommon and it gives me some peace of mind that there’s a chance my iPhone will be recovered if I were to send a message to the phone offering a reward. AirPrint is a nice change to the architecture and should allow more fluid printing across the iOS devices, with Apple likely rolling out additional support in months to come.

Traveling Abroad with the iPhone

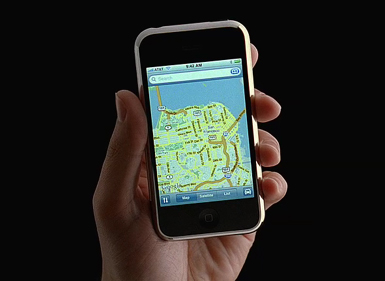
Recently, I visited London and Cardiff on vacation and took my iPhone with me. I knew ahead of time I would like to get the most use out of it, without incurring ridiculous roaming fees, so I planned ahead. This article discusses a number of different solutions and the benefits and limitations of each.

My Goal: Use maps with GPS tracking while traveling abroad

Although the native Google Maps application will not function on the streets of London without an Internet connection, there are applications that you can download ahead of time that will. One application that I liked in particular was OffMaps for the iPhone. It allows you to download maps of any city or region ahead of time, as well as select city guides. The map download is extremely customizable, including selecting the map’s level of precision. The only downside was that these maps/guides have to be downloaded directly by the iPhone (WiFi or 3G) and can take hours to retrieve. I would have preferred an option that let you download the maps from iTunes, utilizing a wired Ethernet connection. Also, you must download maps for all areas you intend to visit ahead of time, as even WiFi connections can be costly and limited abroad.

While I did try other, often city-specific applications, but I wasn’t as impressed with them as OffMaps. Plus, I was able to configure the same application for multiple cities prior to my trip.

After downloading an offline map application, my second goal was to enable GPS. This as it turns out, is trickier than I thought.

Solution 1: Leave the iPhone at home

I considered leaving it at home, but it’s really hard to organize a car service on your return trip if they have no way to reach you. Also, it’s useful to check the time and recent e-mail since my cell phone has replaced my watch as my mechanism for keeping time. Finally, the iPhone is nice for watching TV and movies on the plane as well as listening to music while traveling.

Solution 2: Put the iPhone in Airplane Mode for the entire trip

Most blogs I visited prior to departure recommended putting my iPhone in Airplane Mode for the length of my trip, as it allows you to use WiFi without any possibility of incurring roaming fees. The problem, though, is that it also disables the phone’s GPS, so that you cannot track your current location. Goal failed.

Solution 3: Disable Cellular Data and Roaming

One obvious solution is to go into the General > Network settings and disable cellular data and roaming. There’s a few problems with this though. First, you’re trusting your cell phone not to accidentally charge you for usage. Based on some of the stories floating around the net about being charged thousands of dollars for roaming, that’s just a leap of faith I’m not personally able to make. Second, your battery life is going to be severely limited, because the iPhone will be searching for a signal during the entire trip. Finally, there’s no guarantee some data features won’t continue to process, such as voice mail. With Apple’s Visual Voicemail, the iPhone downloads audio files automatically every time someone leaves you a message. Think of it as a charge anytime someone leaves you a message.

There are steps you can take to disable voice mail while traveling, but I do not recommend them. AT&T has to actually switch your data plan while you’re away, there’s no option to simply disable it. For those with no-longer-available unlimited data plans, switching our data plan can make us a little edgy. Also, there’s no guarantee GPS will work in this environment, although it probably should.

Solution 4: Replace the SIM card

Those absolutely needing international access can buy a SIM from a local carrier. Given that I’m using a US iPhone, and AT&T has severely restricted non-AT&T usage, I wasn’t convinced this would work without jail-breaking the iPhone. Also, there are some security risks from letting your passwords/access transfer over a network you may not be familiar with. Ultimately, I decided this option wouldn’t be worth the headache. If I had a more open, European iPhone, though, I may have felt differently, since in those markets the phone and the SIM are not extremely interconnected.

Solution 5: Lock the SIM card

One excellent recommendation was to install a 4-digit PIN code on the SIM which requires entry every time the iPhone is started and disables all cellular/data communication if not present. The advantage to this is that GPS continues to work in this environment. The only down side is that you have make sure not to forget your PIN code. Also, I had to do a bit of searching to find the ‘default’ pin code that programmed into my SIM card.

Solution 6: Remove the SIM card

Similar to Solution #5, I realized I could just pull out the SIM card. No special tools required, just a paper clip and a plastic bag to put it in (the new Micro SIMs are tiny and easy to lose). Unlike some of the other solutions which rely on software features, this completely prevents data roaming but still allows WiFi usage and GPS support, so it’s the solution I went with. I just left the SIM in a hotel safe and carried the phone around all day. I was successful with my original goal of simulating Google Maps with tracking, as the offline maps and GPS functioned as expected. The only thing I noticed is that true GPS requires much clearer line of site with a satellite. In other words, GPS only functioned when I was out in the open, and sometimes took a while to acquire an initial signal. This is to be expected with GPS technology, but having the iPhone’s data network fix a location faster than traditional GPS has spoiled me over the last few years.

Reflections

Ultimately, downloading the offline maps was the single best step I took prior to my departure. Removing the SIM card was also quite easy to do and gave me peace of mind that the software wasn’t going to ‘accidentally’ allow data connections while traveling. Also, the battery was significantly better with no SIM card, and the iPhone could go for days without charging. I guess the data network usage really does chew up the battery.

Ultimately, GPS was only partially useful, as I was able to figure out where I was on the map pretty quickly based on landmarks. However, had I been traveling in a more difficult-to-navigate city or had a worse sense of direction, I would have probably used GPS more frequently.

visio uml 2 for java (scea)

After taking SCEA part 1 and Core Spring, it is time to work on SCEA part 2.  Or should I say Oracle Certified Master, Java EE 5 Enterprise Architect part 2.  OCMJEA?  It doesn’t matter.  This post isn’t about the SCEA/OCMJEA per se.  This post is about using Visio for current Java UML modeling.  Here’s what I learned or re-learned about Visio.

Why Visio?

You may be wondering why I chose Visio in the first place.  After all Star UML is free.  My original thought was that I have Visio 2002 installed on my machine because I bought a copy when I was in grad school and I am experienced in using it.  In hindsight this wasn’t the best idea.

UML 1 vs UML 2

Visio does not support UML 2.  The SCEA wants UML 2 diagrams.   It looks like the biggest differences are conditional support for sequence diagrams and a new shape for components in component diagrams.

Luckily there are UML 2 stencils for Visio for almost every version of Visio.  Installing them was easy.  It is key to install the stencil before you start creating diagrams as Visio UML shapes can’t integrate with a UML 2 stencil diagram.   The stencils don’t have much documentation, but I found this chart helpful.

Java stereotypes

To add new stereotypes for Java to a diagram, follow these steps to register them.  Then just select the relevant stereotype in your diagram.

  • UML menu > Stereotypes
  • New
  • Stereotype = @Entity (or whatever you want to add)
  • Baseclass = Class, Component or Dependency (depending on the type of diagram)

Java types

To add Java specific types, follow these steps to register them in your diagram.  Then select them in your attributes/operations/methods.

  • UML > Packages
  • New
  • Java types
  • UML > View > Model Explorer
  • Right click java types in model explorer > new >
  • datatype > name

Hiding attributes/operations section in a class diagram

  • Right click shape
  • Shape display options
  • under suppress, click attributes or options

Add documentation to shape in component diagram

  • Right click shape
  • Shape display options
  • Check properties
  • Can add custom property (or documentation) with more detail