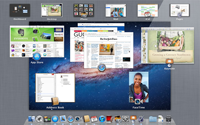
my first mac in 12 years

I bought my first Mac computer.  The last time I had a Mac was 12 years ago.  That Mac and it’s predecessor was as a gift.  It also predated me having the internet at home.  A lot has changed in 12 years!  As I set up the Mac, I’ll be blogging about my experiences, so check back in a week.

Research Online

Apple.com very clearly lets you see your choices.  I was able to find out most of the information I needed there.  I was then able to get my reminding information to decide by starting a thread at CodeRanch.  Now I know what you are thinking – getting advice from an online forum about what to buy isn’t the best idea.  It’s different here because a most of the posters in that thread are fellow moderators who know me well enough to give good advice.  And a couple of the people in that thread are people in NY that I know in real life.  Scott gave good advice too.

Tuesday – Research In store

There was only one of the model I wanted to buy in the store.  Which would be fine except someone was using Facebook extensively on it.  I asked an Apple employee who said people could surf the net for 30 minutes.  So I want to give Apple two thousand dollars, but I have to wait up to 30 minutes for the guy on Facebook!?!  I asked another Apple employee who asked the guy on Facebook to move to a different computer.

Employee #2 was helpful and answered all my questions.  Including stupid ones.  A lot has changed in the twelve years I’ve been on Windows.  I learned it takes four hours to put the RAM upgrade in so I said I would pick up my computer the next day.

I didn’t go to the famous 5th Avenue store to avoid crowds.  There were still crowds, but distributed on three floors crowds are less overwhelming.

Wednesday – Picking up the Mac

In one day, Apple moved the shelves behind the counter which was a little disorienting and had me second guessing what floor I was on.  The pick up was routine.  The large bag was nice and I was able to use it as a backpack.  Which was nice as I wasn’t thrilled about carrying the box in my hands.  Once unwrapped, the laptop will fit in a laptop bag.

I got home late since I went to Ignite after picking up the laptop so didn’t set it up that night.

Thursday – Setting up the Mac

I was able to get online in 10 minutes and to a point where I could do all my regular internet surfing activities in 90 minutes.  This includes time I was checking e-mail and reading the newspaper though.  I’m sure the real effort was less.

To get online:

  1. Unpack box
  2. Plug in laptop and press power button to turn on laptop
  3. See Apple splash screen
  4. Choose English as language
  5. Watch the Welcome movie (I could have done without this, but I suppose it is better than an hourglass)
  6. More language settings
  7. Enter wifi information and apple id
  8. Saw it test the web cam, but choose a stock photo
  9. Choose safari and done – on the internet!

Setup for my regular internet surfing activities (and other things to make me comfortable through the weekend)

  1. Plugin in my old Windows keyboard and mouse until I buy a Mac keyboard and trackpad.  (I keep my laptop about nine inches up and arms length back for home use so use separate peripherals.)  Apple asked me to select a keyboard since it didn’t recognize the type.  The mouse worked without any setup.  I find myself reaching up to the trackpad on the actual laptop instead of using the mouse for scrolling because the trackpad is so much more natural.  Note to self: should have bought the keyboard/trackpad up front.  The current situation is contrived and a bit awkward.
  2. Change screen resolution because default is on the small side.  I chose 1024×768 stretched which feels comfortable.  Probably because that’s the best  resolution I my old Windows XP laptop supported.  Over time I’ll try changing the resolution a little.
  3. Turn on firewall.
  4. Tune energy settings including turning off keyboard lighting.  I have enough light, I don’t need the keyboard creating any.  Besides, I don’t look at the keyboard so that is a waste of energy.
  5. Download Twitter client from App Store.  Entered my credit card info again.  I didn’t realize this was tied to my device (ipad) rather than Apple id.  Was also surprised I had to enter my credit card t download a free app.
  6. Use the browser a little and let it learn my favorite pages.
  7. Download and install Chrome.  There are some websites I don’t like to visit in my primary browser so I can separate the cookies.  Facebook is one of them.  Also, I like to have two gmail accounts open – one for my mail and one for the coderanch book promos.  Having two browsers open lets me keep both logged in.

What’s next

  1. Relearn keyboard shortcuts.  I can get around in the meantime without them and without reading the instructions so this doesn’t need to happen on day one.
  2. Customize the dock
  3. Install open office
  4. Install developer tools
  5. Buy proper keyboard and trackpad
  6. Configure settings in Safari and Chrome.

The stats

Because what kind of tech blog doesn’t post the details:

  • 15 inch monitor
  • 2 GHz quad core processort
  • 8 GB RAM (my previous machine only had 1 GB and RAM is my constraining force.  Granted my previous computer was six years old.)

Conclusion

When I turned on the Mac, my first thought was “it feels like home.”  I can’t believe it has been 12 years since I last had a Mac.  It’s nice to see it again.  It’s also nice to see how much has changed (internet) and how much has stayed the same (menu structure.)  Windows “moved everything” with Office 2007 and it looks like with Windows 7.  Yet my Mac knowledge that is out of date by a decade was enough to find things without instructions.  That says something about usability.


The story continues

18 minutes from alarm to door. A business process engineering exercise

Someone was showing me how to categorize waste in business process engineering (BPE) and mentioned an example about listing every little thing you do getting ready for work in the morning.  I think the idea is to think about every little step and look for waste.  While I’m a morning person, I don’t like to get up earlier than I need to for work.  And that morning person bit starts about an hour after I wake up.  Here’s a stab at the exercise:

My morning ritual

  1. minute 0 – alarm rings, hit snooze, sit up, shut alarm and stand up (the point of hitting snooze isn’t to go back to sleep, it’s to stop the ringing so I can collect myself.)
  2. minutes 1-2- pee, wash hands
  3. minute 3 – turn on radio to CBS 880, take juice and milk out of fridge, put box of cereal on table
  4. minutes 4-5 – drink juice and make bowl of cereal while listening to “traffic and weather on the 8’s”.  Also listen to news headlines if got up at :25 or :55.
  5. minutes 6-9 – finish breakfast
  6. minute 10 – wash dishes
  7. minutes 11-14 – brush teeth, wash up, brush hair
  8. minutes 15-17 – get dressed
  9. minute 18 – grab watch, BlackBerry, id and keys.  Take out Metrocard.  Put on backpack and go.

Assumptions:

  1. I wake up via the alarm.  If I wake up on my own, I am a bit more leisurely about getting ready or check my e-mail on the iPad during my extra minutes.
  2. It’s not my “female time” of month.  It takes another couple of minutes then.
  3. I wake up on the 5 (:05, :15, :25, etc)

Human interaction

I’m only able to be this fast because I don’t have to get ready at the same time as anyone else nor be responsible for another person/pet.  When I lived with my parents, my father and I got ready at the same time.  It took a little longer, but we had a system where neither of us would need to be in the bathroom at the same time.  That bathroom always had someone in there and was definitely the critical resource!

Waste

I suppose having breakfast at home is a form of waste.  I value eating breakfast to be alert over saving a few more minutes.  Other than that, I think I’ve tuned this process to get rid of all waste.  See any?

Liferay Standard Development Environment

I wrote a post a while back outlining the general set up we use when running our Liferay plugins through Continuous Integration, but it occurred to me that there should be an article that comes before that one which outlines the set up of the development environment. Many of the results of the decisions and best practices can be seen in that post, but there is still plenty that can be covered with respect to setting up a development environment for Liferay plugins.

Development Environments

There a few slight changes to the setup described in the previous article, but we’ll assume that a Liferay project always requires the following tools:

  • Liferay Development Studio (LDS). This is essentialy the Eclipse IDE plus some Eclipse plug ins to assist Liferay development.
  • Liferay Software Development Kit (SDK). This does most of the work with respect to building the plugins and the ANT tasks can be used from the command line without requiring the LDS.
  • A Liferay Bundle. A bundle is a pre-packaged Liferay server instance and in our case we tend to use Liferay bundled with Tomcat almost exclusively during development. The other benefit is that the Tomcat bundle is already assumed and pre-configured for some of the steps below and hence simplifies set up and reduces the work and chances of getting things wrong later.
  • Liferay Source. This isn’t essential to the set up, but when creating a new development environment we always do this at the same time and there or little additional effort required.

Recipe

Install Liferay Development Studio

You can install the LDS to the location of your choice and you can use the same LDS instance to manage multiple Liferay project workspaces, but more on this as we go. If you have already installed LDS then there is no need to do it again.

Create a new workspace directory for the Liferay project. For the sake of this article we’ll call the directory workspace.

Note that the Liferay source, SDK and bundle in the next steps should all be for the same version. Don’t mix them up. You have been warned.

Install Liferay Software Development Kit (SDK)

Copy the Liferay SDK zip file eg liferay-plugins-sdk-6.0-ee-sp1.zip to the workspace. Unzip the file so that there is a directory with the same name eg liferay-plugins-sdk-6.0-ee-sp1.

If your operating system does not allow soft links to directories, rename the SDK directory to plugins. Otherwise (and preferably) create a soft link to the SDK directory called plugins. By pointing external configuration at the plugins directory rather than at a specific SDK version, it makes it easier to upgrade your development environmnet later on.

Hopefully it gives you something like this in the workspace directory.

drwxr-xr-x 13      4096 2011-05-26 12:00 liferay-plugins-sdk-6.0-ee-sp1/
-rw-r--r--  1   9358463 2011-03-09 23:38 liferay-plugins-sdk-6.0-ee-sp1.zip
lrwxrwxrwx  1        71 2011-05-26 08:17 plugins -> liferay-plugins-sdk-6.0-ee-sp1/

Install the Bundle

Very similar to the previous step, copy the bundle zip file to the workspace, unzip and either rename or soft link as bundles. The bundles name is important here, so don’t get creative.

This adds the following to our directory:

lrwxrwxrwx  1        66 2011-05-26 08:18 bundles -> liferay-portal-6.0-ee-sp1/
drwxr-xr-x  5      4096 2011-05-26 16:32 liferay-portal-6.0-ee-sp1/
-rw-r--r--  1 187336800 2011-03-09 23:37 liferay-portal-tomcat-6.0-ee-sp1.zip

Install the Source

Once again copy the source zip file to the workspace directory, unzip and rename or soft link as source.

drwxr-xr-x 20      4096 2011-05-26 09:47 liferay-portal-src-6.0-ee-sp1/
-rw-r--r--  1 230320369 2011-03-09 23:37 liferay-portal-src-6.0-ee-sp1.zip
lrwxrwxrwx  1        70 2011-05-26 08:18 source -> liferay-portal-src-6.0-ee-sp1/

The complete Workspace

Remove the zip files if you want, but personally I just leave them there. The parts we’re interested in are the bundles, plugins and source directories.

lrwxrwxrwx  1        66 2011-05-26 08:18 bundles -> liferay-portal-6.0-ee-sp1/
drwxr-xr-x 13      4096 2011-05-26 12:00 liferay-plugins-sdk-6.0-ee-sp1/
-rw-r--r--  1   9358463 2011-03-09 23:38 liferay-plugins-sdk-6.0-ee-sp1.zip
drwxr-xr-x  5      4096 2011-05-26 16:32 liferay-portal-6.0-ee-sp1/
drwxr-xr-x 20      4096 2011-05-26 09:47 liferay-portal-src-6.0-ee-sp1/
-rw-r--r--  1 230320369 2011-03-09 23:37 liferay-portal-src-6.0-ee-sp1.zip
-rw-r--r--  1 187336800 2011-03-09 23:37 liferay-portal-tomcat-6.0-ee-sp1.zip
lrwxrwxrwx  1        71 2011-05-26 08:17 plugins -> liferay-plugins-sdk-6.0-ee-sp1/
lrwxrwxrwx  1        70 2011-05-26 08:18 source -> liferay-portal-src-6.0-ee-sp1/

How the parts interact

Before we complete the configuration, we’ll pause and look at how the parts interact.

Liferay Development Studio (LDS) and Software Development Kit (SDK)

The LDS provides some wizards, configuration checking and general assistance in building and managing Liferay plugins, but mostly it delegates to the SDK to perform the actual build and deploy work.

Therefore in just a second we’ll tell the LDS where the SDK is but first a word of warning…

Excuse me for shouting, but only ever register a single SDK with a Liferay workspace, and make sure it is the one in the workspace called plugins. Having multiple SDKs registered with in a single workspace can cause confusion or worse, and doesn’t add benefit to the environment. Please don’t do it.

LDS and the Bundle

LDS is able to start/stop the bundle but is also able to shortcut the deployment process and deploy straight to the bundle without needing help from the SDK.

Depending on the LDS version used, you may be asked to point to a bundle (or Liferay Runtime) the first time you point the LDS to a new workspace. Be sure to point to the workspace/bundles directory.

SDK and the Bundle

The SDK uses the libraries in the bundle to compile the plugins, and it also needs to know the location of the bunlde directory so that the deploy target can copy the WAR files to the Liferay Runtime

Configuration

As pointed out above, you should only configure a single SDK in the LDS for a given workspace. When you point the LDS to another workspace you are able to specify a different SDK as this value is configured against the workspace and is not global to the LDS. This will come as a major relief as the alternative would be incredibly restricting.

Furthermore, the plugins also have the registered name of the SDK included in their project properties, so it is important that all team members use the same name to describe the SDK within the LDS. I believe our default is liferay_sdk but it doesn’t matter what is selected provided everyone uses the same value. If not, you’ll be forced to fix this value every time someone else changes it in version control, and you’ll be unable to build or deploy until it is corrected. It is very annoying.

We may have already specified the Liferay Runtime when first pointing the LDS at the new workspace, but if not go to the LDS menu and select Window > Preferences and on the Preferences screen select Server > Runtime Environments, select ‘Add’, select the Liferay version for your bundle from the servers available and then point to the workspace/bundles/tomcat directory.

The next step would be to configure the SDK and bundle to work together, but as hinted earlier we don’t need to. If you look into the workspace/plugins/build.properties default settings, the server is already set to tomcat and the server location and deploy folder location are already correct because we have a directory called bundles pointing to the Runtime home directory.

Finally, right click on some spare space in the Package Explorer in the LDS, import, general, import and existing Eclipse project, navigate to the workspace directory, click OK and then select the source directory to import. This is useful for development and debugging.

Creating a new Plugin

When you create a new plugin project in the LDS, the wizard wants to know which SDK to use and since we have a single SDK there is no problem. The wizard ends up creating a new project in one of the subdirectories under the plugins directory, but within the LDS the project will display as if it were in the root directory of the workspace. It isn’t, but it is worth knowing the difference. If you get confused, right click the project in the LDS, go to the properties and look at the resource location.

Plugin Version Control

It is a bad idea to check the entire SDK into version control, so it is lucky that the LDS places them at the base of the Project Explorer. Right click, team, share, happiness.

Adding a Liferay plugin project from version control back into the LDS has some tricks to it.

Firstly, you’ll want to place the plugin project in the correct subdirectory in the SDK. When you import the project from version control, the second screen in the import wizard prompts you to import into the default workspace location. Don’t do this, and instead select the correct SDK subdirectory for that Liferay Plugin project type. But that’s not all.

Unless the bug has been fixed since the last time I checked, importing from version control will get the project into your LDS workspace, but the plugin will be imported as a Java project and not a Liferay Plugin Project; some of the Eclipse facets are lost. This matters. To fix it, right click and delete the project(s) that you just imported from version control but do not delete from the file system. Once again right click on some free space in the LDS Package Explorer, import, LIferay > Liferay Plugin SDK Projects, select the one and only SDK, select the project(s) to import and then they get imported correctly as Liferay Plugin projects.

Conclusion

So while I haven’t spelled out all of the learnings and reasons which has led us to this set up as our preferred Liferay Standard Development Environment, I hope that there are enough reasons provided for you to consider this approach and I hope that there are sufficient instructions provide to recreate the same in your own workspace.