AWS CodeBuild + Bitbucket – Teams = Epic Fail


Updated 8/19/2017: Amazon has now updated AWS CodeBuild service to support Teams! In other words, in the 2 days since I posted this issue, it has now been fixed. Hooray! I now see my team projects in the list of repositories after linking my account. One minor nitpick though… They sort the list of repositories in the drop-down chronologically, not alphabetically. Since I have hundreds of repositories, that means in order to find a particular one I have to remember the order it was created. Hope they fix this (minor) issue too!


As a user of both Bitbucket and AWS, I was recently excited to hear Amazon had announced integration with both AWS CloudBuild and Atlassian Bitbucket. For those unfamiliar with these two products, AWS CloudBuild is part of Amazon’s suite of code automation CI/CD toolset. This service, along with the full suite, provides the ability to automate software build creation, testing, and deployment. Atlassian Bitbucket, on the other hand, is a large source code repository provider. The AWS announcement means that you can now build projects in AWS using Bitbucket repositories as the source.


Or that’s what it was supposed to mean… Apparently, no one told AWS that most professional software development companies use Bitbucket Teams to manage projects. The new AWS integration is accomplished using an OAuth authenticated sign-in from within the AWS CodeBuild project creation wizard. Unfortunately, after logging in it only allows two types of repositories to be selected: public repositories and those in your *personal* account. Most people using Bitbucket professional use teams and do not store the repositories in their personal account. The result is that no repositories are available for integration.

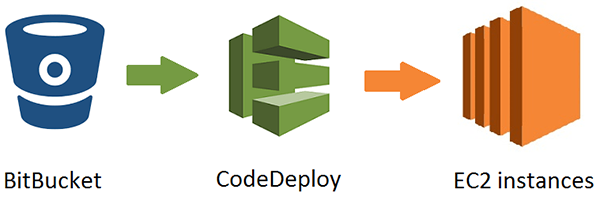
In other words… it’s broken. One solution would be to authenticate with the team login but Atlassian disabled the ability to login with the team account years ago. Now, Amazon only announced this feature recently, so it is possible they will get around to fixing it but in the short-term it is quite disappointing. While there are other ways to integrate AWS CodeDeploy and Bitbucket, I was looking for an all-in-one solution. In fact, when I recently tried Atlassian’s plugin to integrate one of my repositories into AWS CodeBuild, the web page just froze. Oh well, hopefully Amazon will fix this oversight soon!

By the way, you might ask, “Why I don’t just move my source code repository into AWS CodeCommit?” The answer is simple logistics. If I have hundreds of projects used by hundreds of developers, migrating them to a new repository is not easy/fun. The advantage of having this integration working is that it provides a nice, fluid transition toward migrating to AWS builds, without the commitment of actually transferring any repositories.

github two factor and eclipse

I was talking to a coworker recently about using Eclipse with Git. I had done this back in 2010, but it has been a while. I use git at the command line. He also said Eclipse Oxygen support for Git is better than in the past. Could be. To be honest, I don’t remember doing this in 2010 other than the command line being far easier.

Anyway, I decided to try again. The UI was intuitive. I went to commit. The git staging view (confirmation dialog) showed up at the bottom where the console is rather than popping up like SVN does, but that’s minor. It gave me a choice of “commit and push” which is nice as it isn’t a two step operation.

Then I hit a problem. I turned on GitHub two factor authentication back in 2014. Which means my user id/password isn’t accepted through Eclipse. Luckily this is easy to get past:

  1. Go to github and choose settings (from the upper right pulldown under your avatar)
  2. Click the very last link which is Personal Access Tokens
  3. Choose “Create new token”
  4. Enter a description. I choose “Mac Eclipse”
  5. Choose which permissions you want to grant. I chose the Repo checkbox.

Then I tried to commit and push using my git username and the generated token string as the password. Success. (I didn’t pull because nobody else use this repo)

Note: I got an error “git-receive-pack not permitted” when I didn’t choose the Repo checkbox. In Eclipse, it showed my change as committed (which it was), but it wasn’t pushed.

getting an old file in git from a directory than no longer exists

Some time ago, I had deleted a file in git along with renaming the directory it was in. I had wanted to rename the file rather than delete it. So now I needed it back. This took a few steps so I decided to blog what I did.

Step 1 – find the command to get the commit number for my deletion

I had no idea how to do this so I googled it. A comment on this post was really helpful. On OSX, I ran:

git log --diff-filter=D --summary | sed -n -e '/^commit/h' -e '\:/:{' -e G -e 's/\ncommit \(.*\)/ /gp' -e }

While I understand this, I never would have thought to write it.

This gave me a list of all my commits. Then I added | grep myFileName to it and I got the commit where this file was deleted.

Step 2 – Look at commit details

Next I did a git show to see whether it was me or my teammate that

git show myCommitId

It was me. I didn’t know that at the start. Oops!

Step 3 – Retrieve the file

It is possible to do a git checkout of just one file. However the folder structure doesn’t exist anymore in the latest, so this would be a pain. I decided to just get the file from the github UI. I ran the following (with real values for myRepo and myCommitId).

https://github.com/boyarsky/myRepo/commit/myCommitId

Then I viewed and downloaded it. Yay. My image file is back.

Step 4 – Commit again

I renamed the file again and added/committed normally.

Done! It’s now like this mistake never happened. Except in git history!