OCP 11 Book Bonus: Creating a Derby Database in Java 11

Update (11/05/2020): Read The 1Z0-819 Exam page to learn how you can easily our Java 11 Study Guides to prepare for Oracle’s 1Z0-819 Exam, as well as the 1Z0-817 Upgrade Exam.

If you are taking the Java 8 exam, see the Java 8 version of this post instead.

While it is certainly possible to get all the JDBC questions on the exam correct without running any code or understanding any SQL, it is nice to be able to follow along. This blog post is meant to help anyone who has purchased our book, OCP: Oracle Certified Professional Java SE 11 Programmer II Study Guide: Exam 1Z0-816, download and run through the examples in the text. It also includes the database installation instructions and setup code so you can simply copy/paste it. The actual book covers what you need to know for the exam.


This blog post assumes you are reading chapter 10 of our OCP 11 book for 816 exam and have gotten up to the part that references this blog post.


Download Derby

Option 1: Download the derby.jar from Maven Central

Option 2: Apache Derby is an open source database. It is really easy to install and use. To install:

  1. Go to the Derby download page
  2. Click on the link for the latest version. (At the time of this blog post, that was 10.15.1.3)
  3. Download the zip file and unzip it. This will create a folder named something like db-derby-10.15.1.3-bin. The unzipped contents will look like this:

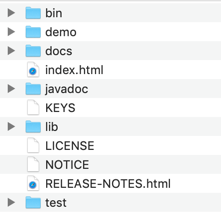
In the lib directory, copy the derby.jar to a convenient location on your machine.

Creating your initial database

To start out, copy this code into a file named SetupDerbyDatabase.java.

import java.sql.*;

public class SetupDerbyDatabase {

    public static void main(String[] args) throws Exception {
        String url = "jdbc:derby:zoo;create=true";
        try (Connection conn = DriverManager.getConnection(url)) {

            // run(conn,"DROP TABLE names");
            // run(conn,"DROP TABLE exhibits");

            run(conn,"CREATE TABLE exhibits ("
                    + "id INTEGER PRIMARY KEY, "
                    + "name VARCHAR(255), "
                    + "num_acres DECIMAL(4,1))");

            run(conn,"CREATE TABLE names ("
                    + "id INTEGER PRIMARY KEY, "
                    + "species_id integer REFERENCES exhibits (id), "
                    + "name VARCHAR(255))");

            run(conn,"INSERT INTO exhibits VALUES (1, 'African Elephant', 7.5)");
            run(conn,"INSERT INTO exhibits VALUES (2, 'Zebra', 1.2)");

            run(conn,"INSERT INTO names VALUES (1, 1, 'Elsa')");
            run(conn,"INSERT INTO names VALUES (2, 2, 'Zelda')");
            run(conn,"INSERT INTO names VALUES (3, 1, 'Ester')");
            run(conn,"INSERT INTO names VALUES (4, 1, 'Eddie')");
            run(conn,"INSERT INTO names VALUES (5, 2, 'Zoe')");

            printCount(conn,"SELECT count(*) FROM names");
        }
    }

    private static void run(Connection conn, String sql) throws SQLException {
        try (PreparedStatement ps = conn.prepareStatement(sql)) {
            ps.executeUpdate();
        }
    }

    private static void printCount(Connection conn, String sql) throws SQLException {
        try (PreparedStatement ps = conn.prepareStatement(sql)) {
            ResultSet rs = ps.executeQuery();
            rs.next();
            System.out.println(rs.getInt(1));
        }
    }
}

To run the program, you need to include the Derby jar file in your classpath. If you don’t know how to find it or encounter problems see the below frequently asked questions in this blog post.

For example:

java -cp "<pathToDerby>/derby.jar" SetupDerbyDatabase.java

If all goes well, the program will output the number 5.

Note that we used single file source code execution here. This simplified the classpath since we only needed to specify the derby jar. Had we compiled our class we would have needed to include it as well (along with an operating system delimiter)

Alternatively, you could have added Derby to your CLASSPATH environment variable and just run the program as

java SetupDerbyDatabase.java

What does this program actually do?

The main method starts out by obtaining a connection to the Derby database. It then calls a run method to actually run the SQL. The run method uses a PreparedStatement with all the data hardcoded.

The code runs two SQL statements to create tables in the zoo database. The commands each include:

  • the table name – exhibits and names
  • the fields in each table along with their type. Integer is like a Java int. Decimal is like a Java double. Varchar stands for variable character and is like a String. The variable length part means that the database doesn’t need to allocate space for all 255 characters and should only use the space for the actual length of the string. (This matters when you frequently update the field with values of different lengths)
  • the primary key for each table – this tells the database how to you uniquely identify each row

Then the code runs seven SQL statements to insert rows into these tables. The order of the data columns matches the order the fields were defined in the create statements.

Finally, the code runs a query to check the rows were added to the database. The count(*) function in SQL always returns a number. For an empty table, this number is zero. Therefore, we can call rs.next() outside of a conditional or loop. We know there is always a number being returned.

Derby will create a “zoo” directory and a derby.log file in whatever directory you ran the program in. The zoo directory is your database.

Frequently Encountered Problems

If you have an error that isn’t here or have trouble with these instructions, feel free to ask a question in the CodeRanch forums

ERROR #1 – DERBY IS NOT IN YOUR CLASSPATH OR POINTS TO AN INVALID LOCATION

Exact error message:

Exception in thread "main" java.sql.SQLException: No suitable driver found for jdbc:derby:zoo;create=true
	at java.sql/java.sql.DriverManager.getConnection(DriverManager.java:702)
	at java.sql/java.sql.DriverManager.getConnection(DriverManager.java:251)
	at SetupDerbyDatabase.main(SetupDerbyDatabase.java:7)

Solution:

Check you are actually pointing to Derby in your classpath. Also check your classpath has the three required components

ERROR #2 – THE TABLES ALREADY EXIST

Exact error message:

Exception in thread "main" java.sql.SQLException: Table/View 'EXHIBITS' already exists in Schema 'APP'.
	at org.apache.derby.impl.jdbc.SQLExceptionFactory.getSQLException(SQLExceptionFactory.java:115)
...

Solution:

The program can only be run once as is. If you want to run it again, uncomment the two “drop table” lines.

Error #3 – NoClassDefFoundError: SystemPermission

Exception in thread "main" java.lang.NoClassDefFoundError: org/apache/derby/shared/common/security/SystemPermission
	at org.apache.derby.iapi.jdbc.AutoloadedDriver.connect(AutoloadedDriver.java:134)
	at java.sql/java.sql.DriverManager.getConnection(DriverManager.java:677)
	at java.sql/java.sql.DriverManager.getConnection(DriverManager.java:251)
	at injection.AttackStatement.main(AttackStatement.java:12)
Caused by: java.lang.ClassNotFoundException: org.apache.derby.shared.common.security.SystemPermission
	at java.base/jdk.internal.loader.BuiltinClassLoader.loadClass(BuiltinClassLoader.java:583)
	at java.base/jdk.internal.loader.ClassLoaders$AppClassLoader.loadClass(ClassLoaders.java:178)
	at java.base/java.lang.ClassLoader.loadClass(ClassLoader.java:521)

If you are using an IDE that uses the module path instead of the classpath, add derbyshared.jar to your module path in addition to derby.jar. (This jar is needed when running with modules.)

Note: While the exam does have topics on modules, they are distinction questions. We recommend using the classpath (and command line) when studying all topics other than the Java Platform Module System.

The 8 Nights of Java – Night 1

Given the holiday season, we thought it would be fun to share our favorite (or least favorite) features from all 8 versions of Java that have been released to date. Some features, like generics and autoboxing/unboxing, were met with a lot of fanfare and have since changed the way we as developers write code. Others, like NIO.1 and RMI, are not nearly as popular today as originally envisioned. With that in mind, we’ll be posting one entry each night on a different version of Java, starting tonight with Java 1.

Oh, we want to wish all of our readers a Happy and Healthy Holiday, as well as a Wonderful New Year!

Jump to: [Night 1 | Night 2 | Night 3 | Night 4 | Night 5 | Night 6 | Night 7 | Night 8]

Java 1.0/1.1 Notable Features
Sun introduced Java 1.0 (codename Oak) on January 23, 1996, with a more stable Java 1.1 released in February of the following year. These versions included:

  • Compiler and JVM runtime environment
  • JDBC
  • The beginnings of reflection
  • Inner classes
  • Thread class

From Scott:

Java 1.0 released.. well, Java! We all take for granted the ability to execute Java code on nearly every platform but back when Java was first released the idea of compiling source code into byte code and running inside a virtual machine was absolutely revolutionary. It was one of the first languages to allow developers to work freely in any environment and deploy to any other environment. Before Java, programmers tended to use the same operating system, same IDE software, and same compiler to write software that often could only run on a handful of environments. Java helped foster the open source movement allowing developers to work in Linux, Windows, MacOS, etc and deploy to any system. At a time when hardware and software systems were much more heterogeneous than they are today, Java helped improve productivity and sharing across a wide variety of landscapes.

Of course, early on there were some problems. Microsoft released Visual J++ alongside Sun’s implementation which contained only a subset of Sun’s features, as well as additional features Microsoft wrote themselves. These differences almost splintered the Java landscape within the first few years, since Visual J++ was so different from Sun’s implementation. Luckily for us, Sun intervened, successfully suing Microsoft on the basis that it violated Sun’s license agreement by releasing a version of Java not compatible with other versions of Java, helping to solidify Java as a standards-based language. In hindsight, articles like “Microsoft’s J/Direct called death of Java” written in 1997 (and comical now) would be the first of many (including a famous interview with Steve Jobs) to incorrectly predict Java’s demise. Today, Java is used in over 3 billion devices worldwide.

My favorite part of Java 1.0? The fact that the Thread class was included right away. Multi-threaded programming was still somewhat new, especially since multi-core processors were still in their infancy. Providing a new language in which developers could process tasks in parallel was pretty forward thinking, even if our thread-base implementations weren’t always perfect. Today, we tend to rely on the Concurrency API given its feature-rich convenience and stability, but never forget it’s is built entirely upon the Thread class.

From Jeanne:

Version 1.0 included Vector. While we no longer use Vector for new code, it paved the way for ArrayList and the Collections framework. JDBC is one of my favorite libraries. I use a mix of raw JDBC, ORM and Spring JDBC template these days, but JDBC started all of this. And then we have the parts of the language that stood the test of time. Plus since Sun/Oracle find it hard to actually get rid of anything from the language, we also have such fond deprecated memories such as Date’s getHours() methods. I was still in high school when Java 1 launched. I never actually worked with it directly as Java 1.2 was out before I started even reading about Java. When Java turned 10, it was cool to read Hello World(s) – From Code to Culture and see how Java got started. Or should I say how Oak got started?

OCP 8 – working with autocommit vs savepoints

You might want to know more about JDBC than is covered by Chapter 10 of our book, OCP: Oracle Certified Professional Java SE 8 Programmer II Study Guide: Exam 1Z0-809. This blog post teaches you about autocommit and savepoints and assumes you have completed reading chapter 10 of our OCP 8 book and are looking to learn more. (Note: we’ve heard rumors this topic is in fact on the exam. It wasn’t when we took the beta but was on the Java 7 exam. So either the questions are left over or it was added back.)

In the book, you saw how to run one statement at a time and have the database automatically see the changes right away. This is called automatic commit or auto-commit for short. A commit updates the database. JDBC provides options for more control by running your code in transactions. A transaction allows a group of statements to go together.

Rollback/Commit

By default, auto-commit is set to true which means each statement is committed in the database as soon as it is run. You can set it to false so statements and prepared statements do not automatically commit data.

The following example gives that control. If anything goes wrong update either of the rows, the entire transaction is rolled back and the database doesn’t change either row. If both are successful, the database sees both.

conn.setAutoCommit(false);
String sql = "update species name = ? where id = ?";
PreparedStatement ps = conn.prepareStatement(sql);
try {
  ps.setString(1, "Elephant");
  ps.setInt(2, 1);
  ps.executeUpdate();
  ps.setString(1, "Monkey");
  ps.setInt(2, 4);
  ps.executeUpdate();
  
  conn.commit();      // send data to database
} catch (SQLException e) {
  conn.rollback();    // don't update database
}

Let’s rewrite this example to focus more on the commit/rollback code:

conn.setAutoCommit(false);
String sql = "update species name = ? where id = ?";
PreparedStatement ps = conn.prepareStatement(sql);
try {
  updateRecord(1);
  updateRecord(2);
  conn.commit(); // send data to database 
} catch (SQLException e) {
  conn.rollback(); // don't update database 
} 

Setting a Rollback point

JDBC has a type called a Savepoint which is like putting a bookmark in a book so you can easily get back there.

conn.setAutoCommit(false);
String sql = "update species name = ? where id = ?";
PreparedStatement ps = conn.prepareStatement(sql);
try {
  updateRecord(1);
  Savepoint sp = conn.setSavepoint();
  updateRecord(2);
  updateRecord(3);
  // oops - let's go back like this didn't happen
  conn.rollback(sp);
  // proceed from there
  updateRecord(4);
  conn.commit(); // send data to database 
} catch (SQLException e) { 
  conn.rollback(); // don't update database 
}