When I set up the Eyoyo digital magnifier, I was excited about being able to hook it up to a monitor. I did not anticipate how much explanation it would be to describe how to switch back and forth between the Chromebook (normal use of the monitor) and this new device. So blog post time.
The initial setup
The digital magnifier comes with a yellow RCA plug designed for the TV. Alas, the computer monitor in use (Dell U2412M 24″ UltraSharp LED Monitor) is a monitor and not a TV. Therefore it doesn’t have that plug. I bought a RCA to HDMI converter and tested it at home. Alas, I got here and the monitor also doesn’t have a HDMI plug. It has DisplayPort (which is in use from the Chromebook via a USB C to Displayport wire). I then bought a RCA to VGA adapter and the blue VGA cable. That worked. Now time to explain how to switch input sources. (That would have needed describing on the TV or monitor regardless of which plugs)
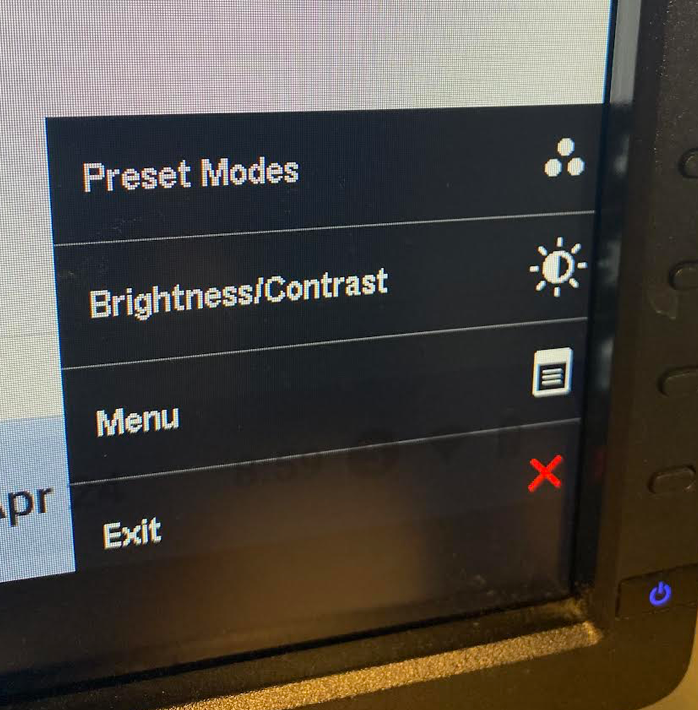
Buttons overview
On the bottom right frame of the monitor, there are five buttons. The bottom one is the power button. The others, I will be calling buttons 1-4 from top to bottom in this blog post.
Annoyingly, there are two modes for the menu. One if it can’t find a signal and the other if it can. Which means two sets of instructions.
Mode 1: Using full menu to switch to VGA for digital magnifier
- First plug in the black TV out wire to the digital magnifier as described in the digital magnifier blog post. (Remember it goes in easier if you turn the wire while pushing)
- Press any of the buttons – I like the top one; button 1
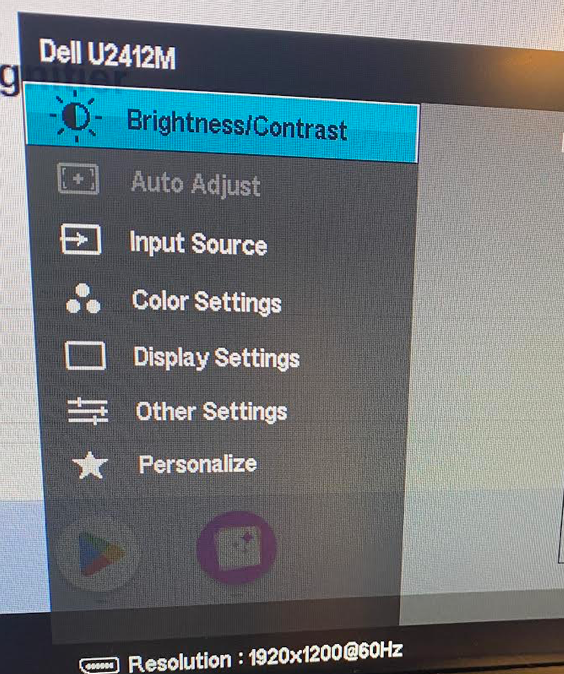
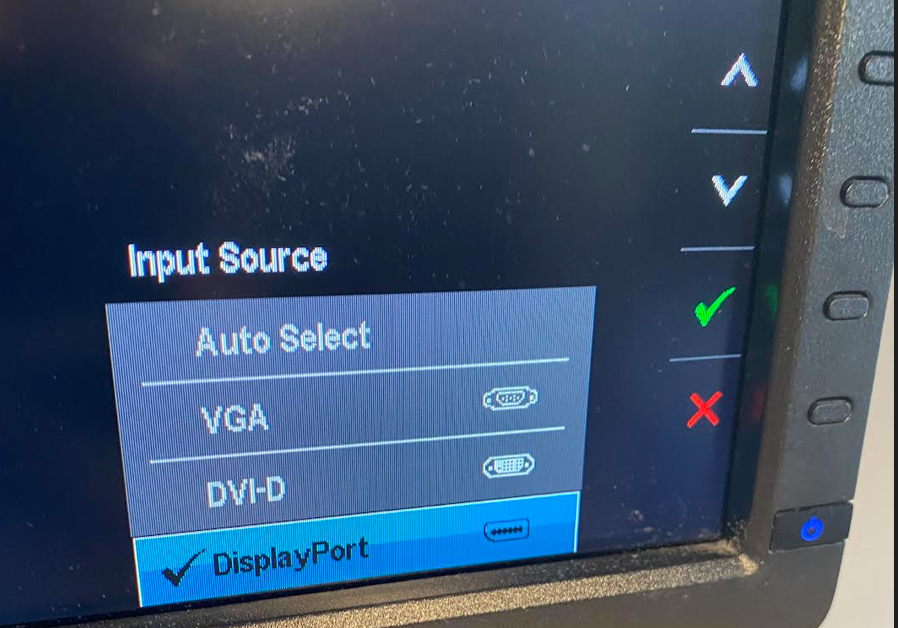
- Press button 3 for “Menu”
- Press button 2 for down so “Input Source” is selected (you might need to press it twice because “auto adjust” may be enabled or not.
- Press button 3 for the arrow to move over to select an input source
- Press button 1 (twice) so VGA is selected
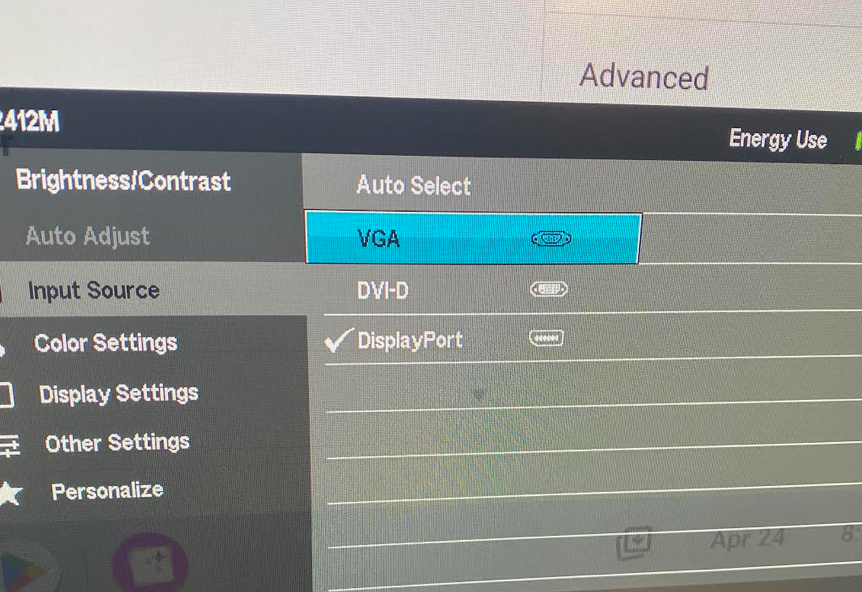
- Press button 3 for the green check to select VGA
- At this point you will get a bright blue screen because nothing is on for VGA. (It may go black if you take forever)
- Press the power button on the digital magnifier. In a few seconds, you’ll see the magnifier on screen.
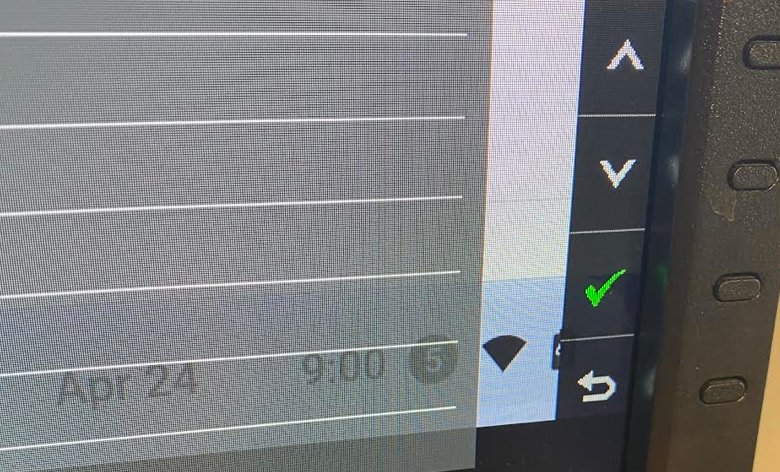
Mode 2: Using input source menu to switch to VGA for digital magnifier
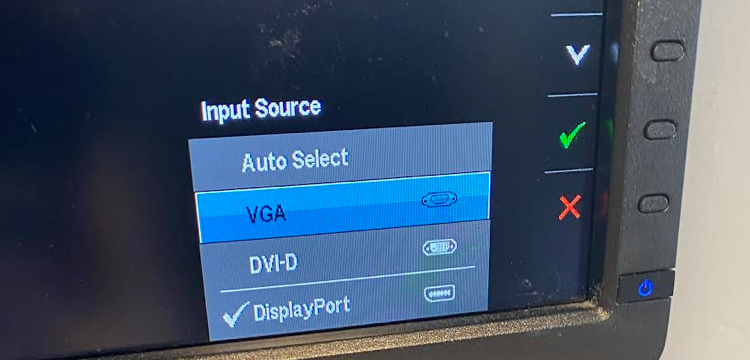
- Press any of the buttons – I like the top one; button 1
- Press button 1 (probably twice) so VGA is selected
- Press button 3 for the green check to select VGA
- At this point you will get a bright blue screen because nothing is on for VGA. (It may go black if you take forever)
- Press the power button on the digital magnifier. In a few seconds, you’ll see the magnifier on screen.
Mode 1: Using full menu to switch back to display port
- Press any of the buttons – I like the top one; button 1
- Press button 3 for “Menu”
- Press button 2 for down so “Input Source” is selected (need to press one or two times)
- Press button 3 for the arrow to move over to select an input source
- Press button 2 (twice or trice) so DisplayPort is selected
- Press button 3 for the green check to select DisplayPort
- At this point you will probably get a black screen since the Chromebook will have gone to sleep
- Press any key on the Chromebook to wake it up
Mode 2: Using input source menu to switch back to display port
- Press any of the buttons – I like the top one; button 1
- Press button 2 (probably twice) so DisplayPort is selected
- Press button 3 for the green check to select DisplayPort
- At this point you will probably get a black screen since the Chromebook will have gone to sleep
- Press any key on the Chromebook to wake it up