I am a Time Warner TV customer because they have a monopoly. I don’t know if FIOS is any better, but it is a moot point at the moment. (And yes Scott, I know there are options like Tivo but you still need cable underneath it to get to the shows.) 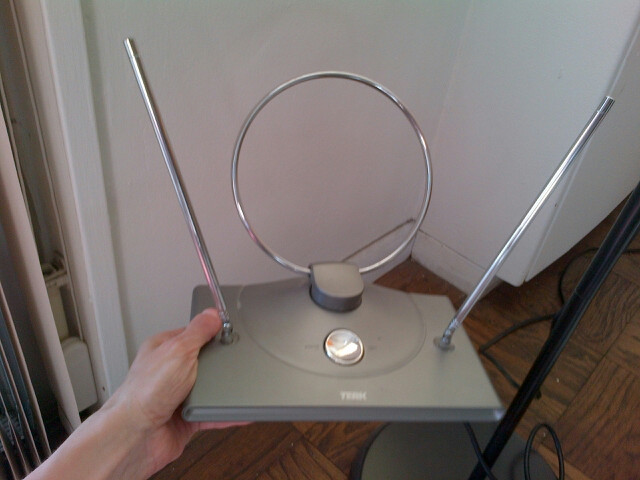
Currently in New York and a few other cities, CBS is blacked out on Time Warner because of a dispute. I wasn’t worried when I heard it because I *maybe* watch CBS once a week during the summer and I have an over the air antenna. However, starting August 25th (US Open Preview show date), I watch CBS a lot. I decide to take this weekend as an opportunity to take my antenna out of a bag and make sure it still works. (Which it should because it did in September when I bought a new TV.) And to make it make it so I don’t need to keep unplugging wires to switch between cable and over the air. I expect CBS and Time Warner to reconcile before the US Open. But I also want to be prepared so I’m not scrambling.
What about Aereo?
An alternative to a physical antenna is Aereo but I’ve heard it isn’t easy to set up while using Time Warner. It’s also $8 month after the trial ends. Which is fine if you are replacing cable but isn’t the best temporary addition. As of April, Aereo was deemed legal. Last month an exec at TIme Warner said “if [Aereo] is found legal, we could conceivably use similar technology. Which means even without another legal challenge, it may become better integrated into cable. Maybe a little antenna in the cable box? [Personally, I’ve always found it silly that cable companies had to pay for something that is free over the air.]
If you need to buy an antenna
I’ve had my antenna for about 8 years. The exact model probably isn’t made anymore, but it is made by Terc and looks like this one.
If I needed to buy an antenna now, I’d go with this one. It is omni directional which means you don’t have to fiddle with the “rabbit ears” to get reception and it takes up less room. And it has optional amplification. Amplification is supposed to make it easier to pick up a weak signal. In practice, it didn’t help when I tried it in San Diego. (I suspect in cities this is less important.) But I’d definitely go with an omni over rabbit ears.
If you need to buy an antenna, they are sold at Best Buy or online. It’s possible there has been a run on antennas because of the Time Warner/CBS issue though. In which case online might be more helpful.
Optional hardware
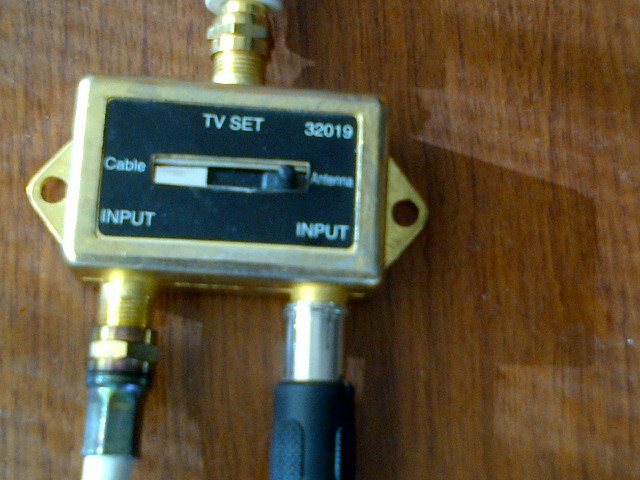
If you are using an antenna for just one station, you’ll be switching back and forth between over the air and cable. I recommend getting an A/B switch. They aren’t inexpensive and can be found at your local hardware store. You’ll also need an extra wire (coaxial cable) to connect the switch to the tv. I had these parts in my “electronics drawer” so I took it out.
Prep
- Look for your TV remote.
- Check to see where the over the air stations broadcast from. (If you live in NY, you can skip this step. They all broadcast from Manhattan.)
- Pick a spot for your antenna. In general, near the window is good. If you have rabbit ears, also try to point one ear in the direction the over the air stations are broadcasting from.
Trying it out – without an A/B switch
Initial Setup:
- On the back of the TV is a plug called “ant in.” Unplug this wire. If you can’t find it, look for the round wire that goes from your cable box to the TV.
- Plug your antenna wire into “ant in”.
- On your TV, set it to use “air” instead of “cable.” You can actually leave it like this. The cable is smart enough to get through when it is plugged in even if you are set to “air.”
- On your TV, run “auto program”. This scans the over the air channels for ones it can find.
- Choose channel list or flip through the channels to find the one you want. Depending on your TV, you may be able to type the “old analog” channel number. For example, in NY this is channel 2 for CBS. You may need to know the new digital channel though. In NY this is channel 43 for CBS.
Switching back to cable:
- Unplug the antenna from “ant in”
- Replug the cable wire to “ant in”
- Select channel 3 on your tv
- Proceed normally for cable.
Switching back to over the air tv:
- Unplug the cable wire to “ant in”
- Replug the antenna from “ant in”
- Select channel you wish to watch on your tv
Trying it out – with an A/B switch
Initial Setup:
- On the back of the TV is a plug called “ant in.” Unplug this wire. If you can’t find it, look for the round wire that goes from your cable box to the TV.
- Plug the A/B switch into “ant in”
- Plug your antenna wire into the A/B switch.
- Plug your cable wire into the A/B switch.
- On your TV, set it to use “air” instead of “cable.” You can actually leave it like this. The cable is smart enough to get through when it is plugged in even if you are set to “air.”
- On your TV, run “auto program”. This scans the over the air channels for ones it can find.
- Choose channel list or flip through the channels to find the one you want. Depending on your TV, you may be able to type the “old analog” channel number. For example, in NY this is channel 2 for CBS. You may need to know the new digital channel though. In NY this is channel 43 for CBS.
Switching back to cable:
- Flip the the switch on the A/B to point to cable
- Select channel 3 on your tv
- Proceed normally for cable.
Switching back to over the air tv:
- Flip the the switch on the A/B to point to antenna
- Select channel you wish to watch on your tv
Summing it up
The choice of whether to use an A/B switch largely depends on whether you already own one and how hard it is to get to the back of your TV. If you can get to the back of the TV easily and aren’t switching every day, it isn’t really worth getting the switch. But I had it, so no harm in taking it out.