Related pages:
Today I took my first online certification exam. Oracle allows online/at home proctoring. I thought of a number of downsides which I blogged about. HashiCorp only permits the Terraform Associate exam be taken online. It’s only a 60 minute exam and doesn’t have a lot of code. It’s also only a $70 exam so I felt ok risking having my home environment being deemed illegal and losing my (well, my employer’s) money.
Laptop Testing
I did the laptop test on my Mac. Safari blocked the software. Chrome allowed it. The built in webcam/speaker/mic were sufficient. Ok. One thing that’s not a problem.
Room setup
The physical room requirements are posted online. The first one is “You must be alone in the room with the doors closed” which immediately poses a problem. The definition of a “room.” I live in a studio apartment – there are two doors. One is the door to the apartment and the other is the door to the bathroom. They want you to do a 360 degree scan of the “room” and have no papers/books/electronics visible. Well the “room” is the entire apartment.
I emailed to ask if I could be sitting on the bed. (I have a portable closet in front of the bed so could be angled in a way the entire “room” isn’t visible. The answer was no because they want you at a “desk” so they can see your head and shoulders. Well, if we are being flexible with the definition of the word “room” on to the word “desk.” My actual computer desk is lovely. It has a keyboard tray and a raised monitor so is ergonomically comfortable. However, a 360 degree view of that spot features a whiteboard, tons of books, papers, electronics, and well most of what I own.
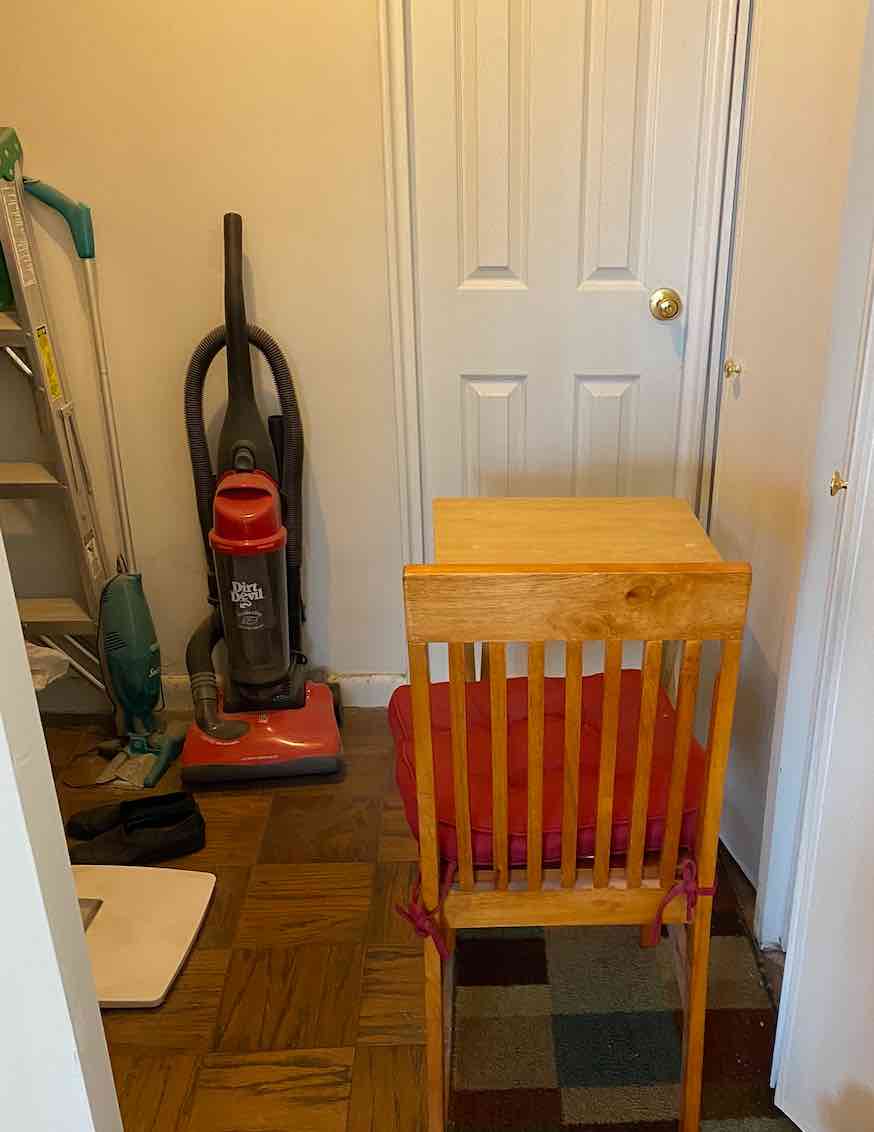
There’s a narrow pathway between the main part of my apartment and the bathroom. So I put a portable table and the chair I use when eating in that spot. (Fun fact: I almost tripped over this when going to bathroom right before the exam.) I faced the bathroom door so the proctor could see I wasn’t looking at anything and nobody was behind me. This was acceptable.
Speaking of “Your whole head and shoulders should be visible for the exam”, they were. However, it was uncomfortable because the laptop was directly on the table. If I raised the laptop or lowered my chair, the my shoulders wouldn’t be visible. However, looking down at the screen isn’t great for you. Luckily, it was a short exam.
They also have “Limited background noise”. I have a lot of background noise from outside, but this wasn’t called out as an issue.
Prep
You are encouraged to start setting up 30 minutes before your exam. It took 25 minutes. First came downloading the 205MB file. Then installing it (623MB). The software prompts you to close a lot of stuff (or click a button to terminate it. For me that was “Please close the following prohibited applications: Chrome, DropBox, Excel, Ipad Screen Mirror, MS Word, Messages, Photos, Safari, Skype, Slack, TextEdit”
Then you take a photo of your id. After that, I was prompted to take a series of videos. Not trivial to do with a laptop. Also the space isn’t wide so I had to turn carefully. While recording what they wanted within 15 seconds. There was a 360 degree scan, floor to ceiling scan, desk scan and wrists/ears don’t have writing on them video. The last one was to video your cell phone being put away. And also, a still photo of yourself. So I had to go get it to prove it wasn’t there. Rolleyes. Then you wait for a proctor to engage you in chat.
The proctor had me redo almost all of the videos live. The one showing the desk/chair took a few tries. The proctor eventually told me to stand up and take it from the distance. When we finished this, it was 25 minutes from when I started the procedure. Then the proctor told me to close the chat and start. I couldn’t find a button to close the chat, but it automatically closed a minute later.
The actual exam experience
The actual exam software was a lot like taking it an an exam center. You could flag questions. There was also a highlighter I didn’t try. Except
- You can’t look away from the screen. I look away from the screen A LOT during normal use. Even when I’m working. I look at a paper, a random point in the distance, the keyboard (when looking for special characters), etc. When I work on the writing my book, I set a Pomodoro timer and physically get up every 25 minutes. And even then, I’m shifting what I look at (writing, IDE, docs). Before I started setting the timer, I’d feel dizzy starting at the computer. I didn’t know if this would be a problem for a short exam. It was. I ended the exam at 38 minutes (plus the end of setup and some survey questions before/after). I was already feeling a little dizzy at that point. Not enough to get a headache or motion sickness feeling after, but still not good.
- Hack: while you can look away, you can yawn. Which goes with about 3 seconds of having your eyes closed. It didn’t prevent the dizziness, but did let me get through the exam.
- I like to write when taking certification exams (or working for that matter.) It helps me organize my thoughts and remember stuff. I definitely felt the impact of not being allowed to writing materials. (not even an online whiteboard.)
- There are 57 questions on the exam. They are numbered 2-58. Question 1 is about working for a HashiCorp partner. Question 59 is instructions to submit. Then there are a bunch of survey questions like how much experience you have. The last question was employer’s name. I wrote “prefer not to say”, but wanted to write “none of your business.” This is a cert test not a vendor at a conference giving me free stuff in exchange for that info. (And I write CodeRanch there rather than actual answer)
Getting results
After answering the survey questions, you get your score and the % per section. It was also emailed at the same time. As was a credly link for the badge.