Part 1 covered buying a Chromebook. I tried setting up Chrome OS (Chromium) on a virtual machine last year. In addition to covering set up here, I’ll also remark on how it is different for a “real computer” so techies can support a Chromebook without actually having one.
Part 1 ended with me turning on the computer. Let’s see where we go from there.
The first time you use the computer
- Tell the machine how to connect to the internet. (The dark lines don’t appear on the screen and seem to be an artifact of taking a photo of the screen. Can’t take a screenshot before logging in.) *** Important *** you must connect via wifi the first time; you can’t go straight to 3g. This means you need to take the laptop to a library/starbucks/etc if you do not have home wifi. This seems like it could be a problem as some public wifi requires a browser to get started. Luckily, I am at home where I do have wifi.
 This step was different than the virtual machine since I was already online for the virtual machine.
 - I selected my wifi network and entered my WEP key. There is NO feedback at all that something is happening for about a minute. If your key worked, the continue button becomes enabled. If not, you see a yellow message saying it couldn’t connect. However, either of these takes a little while – in which you are left wondering if the Chromebook is doing anything.
- Accept terms and conditions. I unchecked about sending crash data to Google. If I’m paying based on bandwidth used, I don’t want to waste any.
- Oh, did you want to use your Chromebook? Sorry. The first thing that happens is a system update. It’s a large download. I don’t have the fastest wifi, but the progress bar appears to be going slowly. And I can tell it is busy downloading, because the internet speed on my “real computer” is crawling implying the Chromebook is using it all. I really hope it doesn’t do this for each update! It took 35 minutes.

- After ChromeBook reboots automatically, logon with your google username/password. From here on, it is similar to the virtual machine setup

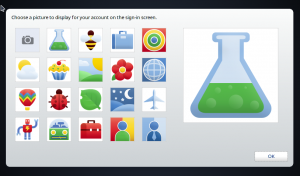
- Interestingly, you get prompted for an image even if you already have with that google account from another ChromeBook.
- The “home page” screen is a list of things you might want help with for the ChromeBook. (This screenshot is my first taken on the Chromebook!)

- To get started you click on the gmail or chome icons at bottom. Once you are in a browser, you can add more tabs and surf the internet as normal. The icons to use as starting points are:
-
- Chrome (browser)
- Gmail
- Google search
- Google docs
- Youtube
- Tips and tricks
- Downloads folder
- Current browser tab
- Apps – like a desktop with more icons as shown here:


Issues
- You have to be on wifi the first time. Since the laptop supports 3g, it would be nice to go right to 3g
- The icons at the bottom of the screen have text under them. However this text is cut off using the default resolution. Odd since everything else seems to work out of the box.
Pingback: getting started with the chromebook – part 1 | Down Home Country Coding With Scott Selikoff and Jeanne Boyarsky
Great article! I’m excited to see how the 3G turns out. The 35-minute update reminds me of what happens every time I turn on my PS3. Forcing people to do frequent updates is unfriendly in my book.
Thanks Scott! Check back in a week or so to see my thoughts on the 3G. So far it is working ok but I haven’t used it enough to be sure.
I’m also tracking how often you have to update. Once when it comes out of the box isn’t bad. After all they loaded the OS a long time ago. If it is a weekly thing, I’ll be mad. Especially if it counts against the 3G threshold which I’m sure it would!
Pingback: getting started with the chromebook – part 3 | Down Home Country Coding With Scott Selikoff and Jeanne Boyarsky
Pingback: chromebook on the road | Down Home Country Coding With Scott Selikoff and Jeanne Boyarsky
Pingback: chromebook recovery disk and external monitor | Down Home Country Coding With Scott Selikoff and Jeanne Boyarsky