Someone at work was asking me about robots for kids. I offered to lend him my Finch to try out. I noticed there’s an experimental language called Snap! on there now which says it can be used by ages 4-7. The idea of Snap! is that it is a simplified Scratch which is also supported. I really like that the Finch supports such a range of languages from ones like Snap! and Scratch to “full fledged” languages like Java and Python. I also like that it has a variety of sensors so you can incrementally make things harder.
Anyway, I wanted to give Snap! a try to see how easy it was too use. My was it easy. Including downloading the software, it took me less than 15 minutes to get the finch to move forward and back having a different color nose when pressing keys. (and another 15 to make sure installing Java 6 didn’t mess up anything else on my machine.)
Install (parent required)
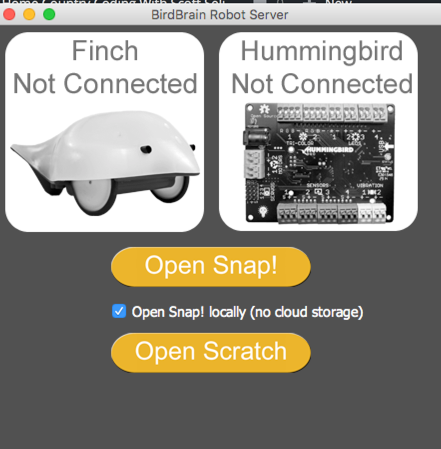
I downloaded and installed the BrainBirdRobotServer which was clearly described on the Snap! page. Installing was the usual for Mac; just drag to the Applications folder. The only catch was that I had to re-install the long since unsupported Java 6. Not a big deal. The software even gave me the link. And it didn’t muck with my paths for anything else so Eclipse/Ant/Tomcat/Postgres etc still work normally.
Setup and initial run (parent required)
This isn’t hard, but it does require being able to read so a four year old isn’t going to be able to do it alone.
- Open BrainBirdRobotServer
- Click Open Snap! I choose local since I wasn’t planning to save my program

- Plug in the Finch. (One end of the wire goes into the Finch and the other end goes into a USB drive on your computer. I put it in a USB hub
- Write program. It opens with a simple one that drives forward with a green nose if you press space. I adapted it to go forward with a green nose when you press the up arrow and backward with a red nose when you press the down arrow.
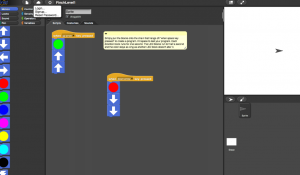
- Press up and down and watch Finch move. That’s it.

Play
What more to say here. These basic blocks already do stuff. And then the parent can show the kid more blocks.
Making it harder
Assuming the kid can read (or you are present), the higher levels of Snap! allow writing more complicated programs. I couldn’t figure out how to change the level other than editing the URL. You can easily sense the pattern here. The only catch is that I had to load the page twice with the new level URL to see it.
- http://snap.berkeley.edu/snapsource/snap.html#cloud:Username=birdbraintech&ProjectName=FinchLevel1
- http://snap.berkeley.edu/snapsource/snap.html#cloud:Username=birdbraintech&ProjectName=FinchLevel2
- http://snap.berkeley.edu/snapsource/snap.html#cloud:Username=birdbraintech&ProjectName=FinchLevel3
The higher levels allow adding timing delays and such.
Caveat
As far as I can tell, the Snap! language doesn’t allow you to use all the sensors on the Finch. But it looks like a fun way to get started. (Not true. The highest levels can at least use some of them)